Conversation Heart Cake Pops
These conversation heart cake pops are a fun, festive twist on traditional cake pops that are super easy to make and even more yummy to eat! Grab some heart-shaped molds, fill them with freshly made vanilla cake, and cover them in pastel candy melts for the ultimate Valentine’s Day treat.
Conversation hearts are the most classic candy associated with any holiday, so I knew I wanted to do something fun with them this year! A sweet vanilla cake with vanilla candy melts was just the right amount of “plain” flavor to pay homage to the original Sweethearts recipe rather than the more modern ones. The vanilla cake is super moist, and since they’re bigger than typical cake pops, they make a much more filling dessert to share with your Valentine, friends, or family!
Here are some more cake and cupcake recipes you’ll love: Small Batch Red Velvet Cupcakes with Cream Cheese Frosting, Black Forest Cake, and Honey Rum Cupcakes with Brown Butter Buttercream.

Ingredients & Equipment
You’ll need the following ingredients and equipment to make these conversation heart cake pops:
- Heart containers
- Flour
- Sugar
- Baking powder
- Eggs
- Canola oil
- Milk
- Vanilla extract
- Salt
- Milk (or frosting)
- Candy melts
- Food safe pens (or gel food coloring)
Customize This Recipe!
There are a few different ways you can customize this recipe:
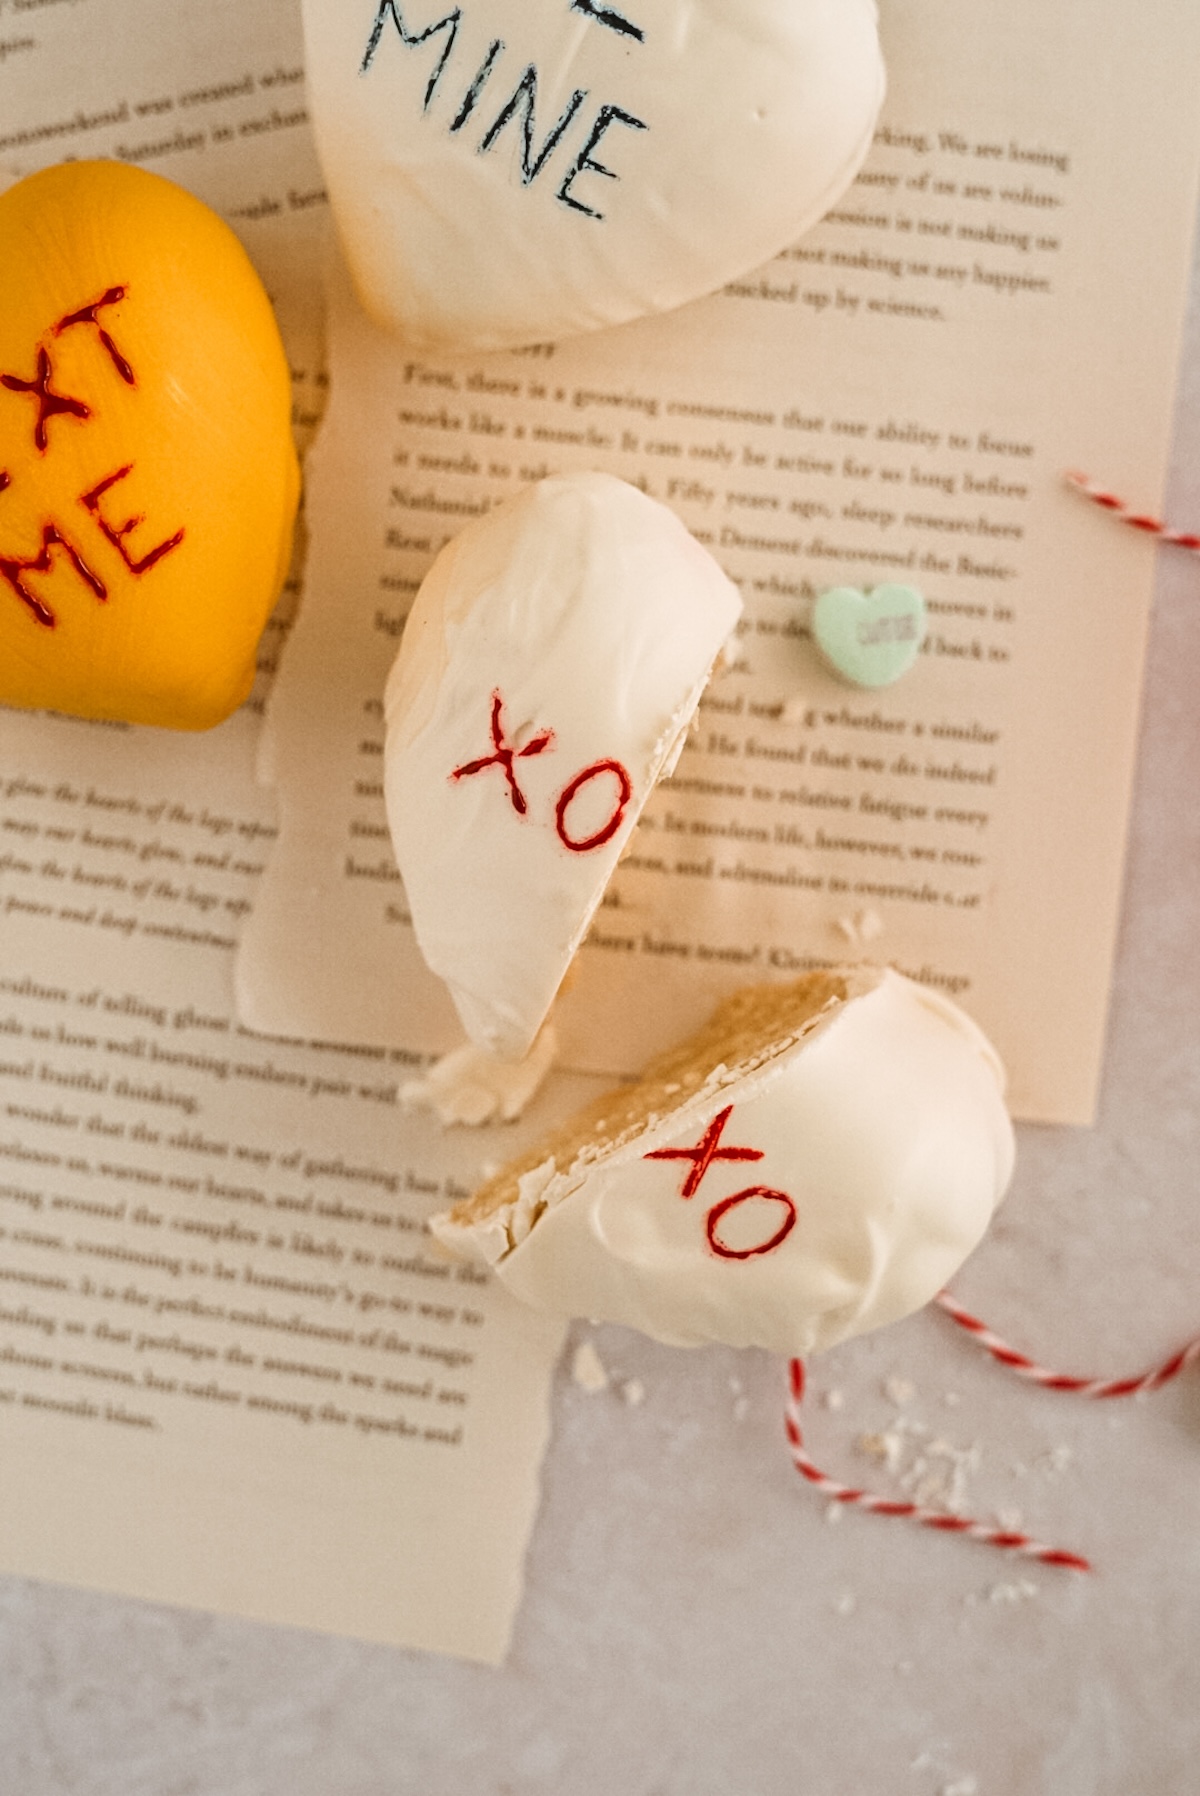
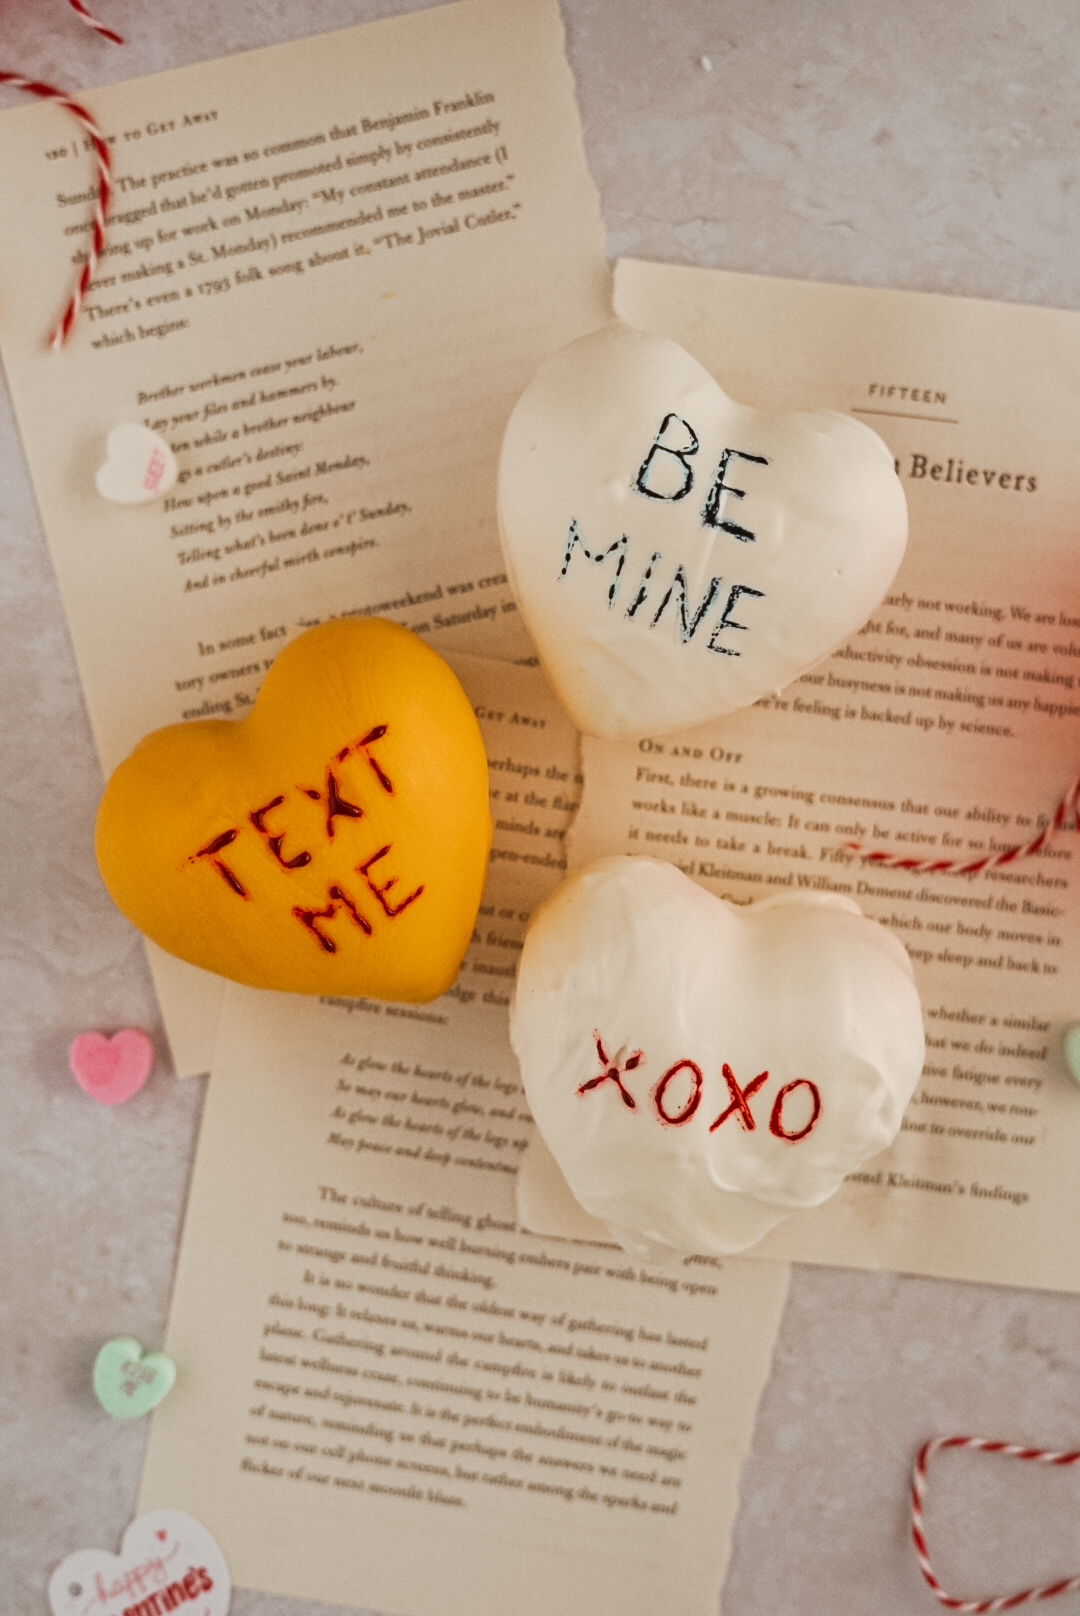
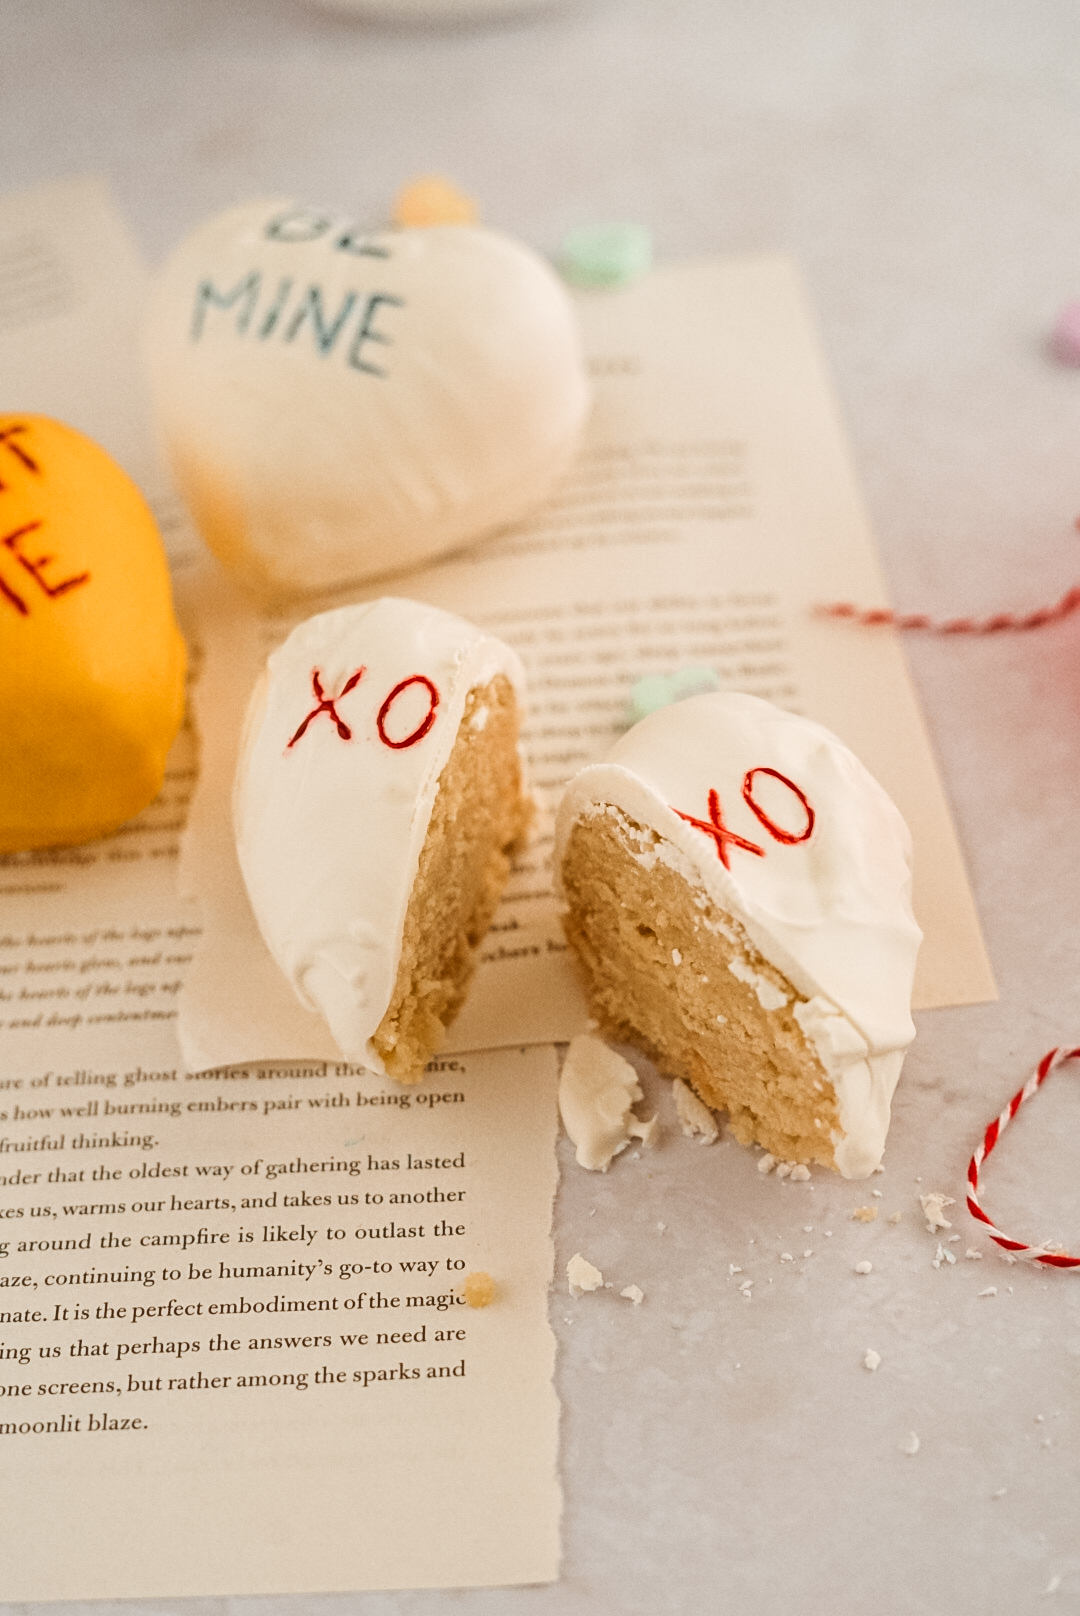
- Customize your messages. Making these cake pops for a special someone? Write personalized messages, inside jokes, or pet names on the tops!
- Play with colors. You don’t have to make your cake pops identical to the original conversation hearts – play around with candy melt colors to make your cake pops extra special!
Kitchen Tips:
- Utilize mise en place! Make sure you have all of your ingredients prepped and ready before you begin making this recipe – it will help save you time and keep you organized.
- Directions are your friend. Be sure to melt your candy melts based on the package directions, and if you can, get the melts in the colors you want! Adding food coloring usually messes up the silky consistency of the candy when it’s melted, so make sure you have shortening to add if you’re going to be using food coloring.
- Writing tools: Food safe markers will be easiest to write cute messages on the top of these cake pops, but if you can’t find those near you, you can use gel food coloring like I did (just note that it will be patchy!).
More Valentine’s Day recipes:
Did you make this recipe? Leave a star rating and/or review below to let me know how it turned out! To keep up with all my latest recipes, subscribe to my newsletter and follow along on Instagram. 🙂
————————

Conversation Heart Cake Pops
Ingredients
For the cake:
- 1 ½ cups flour
- 1 cup sugar
- ¾ tsp baking powder
- ¼ tsp salt
- 2 eggs
- ¼ cup canola oil
- 1 cup milk
- ½ tbsp vanilla extract
For the molds:
- 2 tbsp milk
- 2 bags candy melts in any color
- 4 heart shaped plastic containers or molds*
- food safe pens/markers**
Instructions
For the cakes:
- Preheat your oven to 350ºF and prepare an 8 or 9 inch cake pan.
- Mix all your ingredients together in one bowl, starting with your dry and finishing with the wet.
- End with the milk, adding 2/3 cup to start and add a little more if you need your batter to be thinner.
- Mix together until fully combined, then pour into your prepared cake pan.
- Bake for about 20-25 minutes, until a toothpick comes out clean.
- Let the cake cool, then crumble it up and prepare to mold.
For the molds:
- With your crumbled cake in a bowl, add a few spoons of frosting or a splash of milk, just enough to hold the cake together.
- Press your cake into the molds – if you're using plastic containers like the ones pictured, you'll want to press cake into each half of the heart and then push them together tightly to combine the two halves.
- Once you're done molding or cutting out your cake hearts, wrap them in plastic wrap and place them in the freezer for about 5 minutes, just to harden slightly. this will help if you need to remove the cake from any molds or plastic hearts.
- Once your cake pops have chilled, remove them from any plastic wrap, mold, etc. and place them on a plate or tray covered with tin foil or parchment paper.
- Melt your candy melts according to package instructions, and dip your cake pops in one of two ways: either transfer the candy melts to a deep bowl and dip each cake into the melts using a thick toothpick or even a fork – or lay your cakes out on a tray and pour the candy melts evenly over each heart.***
- Let the cake pops harden on the counter or in the fridge before decorating.
Notes
*As an Amazon Associate, I earn from qualifying purchases.